[Download code for the project: GitHub]
This is the first post in a series that explain how to use OpenGL ES in Android or iOS by performing most of the GLES tasks in native code. This post’s aim is to setup GLES context in Android and render to the display using GLES from the native code. The rendering call will simply change the screen color to blue. The native code will read the OpenGL ES and GLSL versions that is later displayed on the screen using Java. We will also see how to communicate between GL and UI threads in Android.
Here’s a screenshot of the output on a Nexus 5.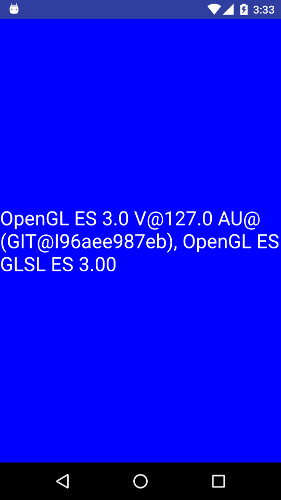
Contents
Our approach: OpenGL ES in native
Since this is the first post, let us look at details of our approach based on development in native code.
How to reuse native code across mobile OSs’?
When I started using GLES in mobile devices, I faced a major problem; how to reuse the same code across all mobile platforms? Though there are many GLES tutorials on the web, they mainly focus on Java for Android or Objective-C for iOS. I was not keen to rewrite the GLES code for two OSs’ since it would have doubled my programming efforts. Hence I started to develop the GLES code in native C++, while leveraging the benefits of Java or Objective-C for developing the app. This approach substantially simplified efforts since the GLES code can be reused across both mobile platforms.
GLES in native C++ code
We will leverage Java in Android (or Objective-C in iOS) to create a GLES context, manipulate UI elements, manage the app’s life cycle, etc. — and focus on how to use GLES in C++. This includes using the native code to load GLES shaders, display 3D models, manipulate camera images, and render the display. Later we will also use the GPU in the mobile device to efficiently perform parallel computations (GPGPU).
My approach may appeal to OpenGL experts who are comfortable with using GL on the desktop and need a few nudges to get started on mobile platforms.
Pre-requisites for Android
- Android device (KitKat or above). I do not like to test GLES on the emulator and cannot guarantee that the code will run on it. In fact I test the code only on a couple of devices and cannot guarantee that it will run on your device, but I hope we can live with that 🙂
- Android Studio (AS): I’m using AS 2.1.2. Please install the latest version since Android continues to improve support for development of native code. If you are still using Eclipse for Android development, then it’s time to migrate to AS.
- Android NDK: I’m using Revision 11c. If you have never used NDK, then download it and go through the concepts of NDK. But I hate mentioning (I really do) that some of those concepts are outdated and we will be following a new approach that was recently introduced in Android (see next bullet).
- Gradle experimental plugin: This plugin introduces a different approach to deal with native code and improves support for NDK in AS. Since this is rapidly evolving, I’ll update the project structure when there are any significant changes. If you are familiar with the old approach (using Android.mk and Application.mk), then read the plugin’s documentation to understand the differences.
- Android app development, JNI: We will assume a working knowledge of Android and JNI.
Alternative to NativeActivity in Android for native development
If you browse Android’s examples that use NDK or read the official NDK documentation, then you see that Android encourages using the
NativeActivity class for developing apps based on native code. This approach minimizes interaction with Java and effectively moves control to the native code. I believe that the NativeActivity class is unwieldy for integrating native code with various components of Android like UI elements, display, threads, and lifecycle methods. NativeActivity class is useful only if your app is purely based on native code or if you don’t want to use Java. I also disagree with many online forums that suggest NativeActivity class is the natural (or only) approach to develop apps that predominantly rely on native code.
We will follow a different and, in my opinion, simpler approach where the GLES context is created in Java and native functions are called through the JNI interface. This allows us to handle UI elements and manage the activity lifecycle in Java with standard approaches, while shifting all the GLES tasks to native.
Dive into the code
Get the code
The project is available on GitHub. Once you download the code and import it in AS, you will be prompted to specify the path to NDK. In older versions of AS, you need to add this line to <project_path>/local.properties:
ndk.dir = <NDK_path>
AS will complain if you do not have the Gradle experimental plugin or required versions of Android SDK and build tools. Please download and install the missing components.
Now you should be able to run the code on your device and see an output similar to this. The OpenGL ES and GLSL versions displayed on the screen can differ across devices.
Code overview
We created a basic project in Android Studio and added files relevant to our project. Let us look at important files that we have added in the project (all paths are relative to <project_path>/app/src/main):
- com.anandmuralidhar.glescontextandroid/GLESContextActivity.java: We have only one activity in the project as defined in this file.
- com.anandmuralidhar.glescontextandroid/MyGLRenderer.java: This file contains functions that render to the device display.
- com.anandmuralidhar.glescontextandroid/MyGLSurfaceView.java: This file creates the GLES context and sets a renderer.
- jni/glesNative/glesNative.cpp: It has methods of
GLESNativethat perform GLES-related initialization and render to the display with GLES calls. - jni/glesNative/myLogger.h: It defines functions that are useful to dump output to logcat for debugging purpose.
- jni/jniCalls: It has two files corresponding to the JNI calls of
GLESContextAndroid(glesContextAndroid.cpp) andMyGLRenderer(myGLRenderer.cpp).
Create GLES context
Android provides us with two fundamental classes for using OpenGL ES: GLSurfaceView and GLSurfaceView.Renderer.
In the app, there are two classes MyGLSurfaceView and MyGLRenderer that are extended from GLSurfaceView and GLSurfaceView.Renderer respectively. MyGLSurfaceView creates a GLES context and is similar to other views in Android like ImageView and TextView — with the difference that it allows us to manipulate graphics using OpenGL ES.
Let’s look at the constructor of MyGLSurfaceView. Android has a simple command to create a GLES context:
setEGLContextClientVersion(2);
This command uses default configurations to create a GLES surface that allocates 8 bits for each of the R, G, B channels, with at least 16 bits for the depth buffer. It is possible to change these configurations and create a custom GLES surface by setting various EGL parameters, where EGL is the interface between OpenGL ES and the windowing system. We can set properties like transparency of the display or create a GLES surface with reduced precision in the depth buffer. We skip these options since the default configuration suffices for this project.
Once we create a GLES context, we can render to the GLES surface. Once again Android has a simple mechanism and provides a GLSurfaceView.Renderer to draw on the created view. We have extended GLSurfaceView.Renderer to create MyGLRenderer and set it as the renderer for MyGLSurfaceView.
mRenderer = new MyGLRenderer();
setRenderer(mRenderer);
Finally we ask GLSurfaceView to continuously render on the surface:
setRenderMode(GLSurfaceView.RENDERMODE_CONTINUOUSLY);
This is not the optimal approach for this project since it will repeatedly render on the surface even if the display has not changed. It is possible to set the GLSurfaceView.RENDERMODE_WHEN_DIRTY flag so that GLES surface gets rendered after we call requestRender in Java. But we will keep it simple and render the display continuously.
Finally we enclose the constructor in a try-catch so that we know if there is trouble. GLSurfaceView creates a separate GL thread for calling the rendering functions.
MyGLRenderer is also very simple and implements three methods of GLSurfaceView.Renderer. In each of the three methods, we call their corresponding native functions.
-
onSurfaceCreatedis called whenever the surface is created or recreated. -
onDrawFrameis called to render the current frame. Since we setGLSurfaceView.RENDERMODE_CONTINUOUSLYinMyGLSurfaceView, this function is called continuously. -
onSurfaceChangedis called when the dimensions of the surface change. This typically happens when the device changes orientation and if the app is designed to handle both portrait and landscape orientations.
We do not call the above methods explicitly since they are called by Android at the appropriate time. We will soon look at native functions corresponding to above methods.
Note: It is important to remember that above methods defined in MyGLRenderer are internally called by Android on a GL thread and not on the UI thread. This means that we cannot perform various UI-related tasks in these methods. In turn, we cannot make GLES calls from functions that are on a non-GL thread.
Android activity
Next let’s understand the only activity in our app: GLESContextActivity. onCreate of the activity creates the native objects and to sets up the layout.
public void onCreate(Bundle savedInstanceState) {
    super.onCreate(savedInstanceState);

    // call the native constructors to create an object
    CreateObjectNative();

    // layout has only two components, a GLSurfaceView and a TextView
    setContentView(R.layout.gl_context);
    mGLView = (MyGLSurfaceView) findViewById (R.id.gl_surface_view);
    mTextView = (TextView) findViewById(R.id.gles_version_textbox);
}
We defer discussion on native calls for later. The layout has only two elements — a MyGLSurfaceView and a TextView. When we call setContentView, it calls the constructor of MyGLSurfaceView, creates the GLES context, and sets up MyGLRenderer as the renderer for the view. It’s as simple as that!
Android specifies that whenever the parent activity resumes or pauses, we should respectively call onResume and onPause on GLSurfaceView. We handle this by calling mGLView.onResume and mGLView.onPause in the appropriate functions.
In the end, we load the shared library that contains the native code. The name of the shared library is specified in build.gradle.
static {
   System.loadLibrary("GLESNative");
}
If you forget to call this function, then native code will not be loaded and you will get a runtime error.
Communicating between GL and UI threads
In onResume of GLESContextActivity, we call an AsyncTask to display details of OpenGL ES and GLSL versions:
new AsyncDisplayText().execute();
Now mTextView is a UI element and can only be updated in the UI thread. But the GLES command that to query the GLES version will only work on the GL thread. Hence we use an AsyncTask to communicate across GL and UI threads.
AsyncDisplayText keeps polling in doInBackground to check if the native GLES inits are done and if the GLES version can be queried. doInBackground executes in a background thread and we allow the thread to sleep for 100 milliseconds between queries. Once IsInitsDoneNative returns true, onPostExecute is called. This function executes on the UI thread and allows us to update mTextView. We fetch the GLES version from the native object with GetGLESVersionNative and display it.
JNI calls in methods of AsyncDisplayText do not call a GLES function. The GLES functions are called on the GL thread in the methods of MyGLRenderer. Any information that needs to be passed to the UI thread is stored in private variables of the native object and read when required.
There are many methods for inter-thread communication in Java but AsyncTask is especially useful for asynchronous work on the UI thread.
Native code
The native code is in <project_path>/app/src/main/jni and is split across two directories; glesNative and jniCalls.
glesNative
There are three files here: glesNative.cpp/.h and myLogger.h.
myLogger.h contains functions for printing output to logcat. All functions defined here override the NDK function __android_log_print. This function is effectively a substitute for printf while debugging code. The functions in myLogger.h can log events like errors, warnings, information, etc., for debugging purpose. We have also defined LOG_TAG as the project name. LOG_TAG is a tag that prepends all logs and makes it easy to filter logs relevant to our project in logcat.
glesNative.cpp/.h defines the native class GLESNative that we use for rendering a blue screen. Let us start with GLESNative::PerformGLInits. This function performs the initialization before we start rendering to the GLES surface. We start by clearing the GLES surface.
glClearColor(0.0f, 0.0f, 0.0f, 0.0f);
glClearColor takes four arguments for the red, green, blue, and alpha channels respectively. These values can range between 0.0 and 1.0. For example, if we want to clear the background to yellow then we set glClearColor(1.0f, 1.0f, 0.0f, 0.0f). The alpha channel controls the transparency of the surface.
Next we read the OpenGL ES and GLSL versions on the device by calling glGetString with two different arguments.
std::ostringstream version_string;
version_string << glGetString(GL_VERSION) << ", " << glGetString(GL_SHADING_LANGUAGE_VERSION);
glesVersionInfo = std::string(version_string.str());
We will use GLSL in a subsequent post to to develop shaders and perform complex operations while rendering to the surface. GLES and GLSL versions are concatenated and stored in a variable.
If glGetString(GL_VERSION) returns that OpenGL ES 3 is available in the system, then we need to explicitly load the pointers for GLES 3 functions. I've adopted the approach followed in Android NDK examples where gl3stubinit is used to load the function pointers. This function is available as part of the ndk_helper module.
const char* versionStr = (const char*)glGetString(GL_VERSION);
if (strstr(versionStr, "OpenGL ES 3.") && gl3stubInit()) {
   MyLOGD("Device supports GLES 3");
} else {
   MyLOGD("Device supports GLES 2");
}
When you run the app on your device, please check the logcat to confirm the GLES version supported by it.
We set initsDone to indicate that the native object is ready and call CheckGLError to see if there are any GLES-related errors.
initsDone = true;
CheckGLError("GLESNative::PerformGLInits");
CheckGLError is a very useful function that should be called as often as possible while developing and debugging GLES code. It check errors in GLES function calls and indicates the reason for the error. GLES documentation for a function mentions error codes for incorrect function calls or if the function call fails.
Our rendering function, GLESNative::Render, is fairly simple since it clears the screen and chooses a blue background.
// blue background
glClearColor(0.0f, 0.0f, 1.0f, 0.0f);

// clear the screen
glClear(GL_COLOR_BUFFER_BIT | GL_DEPTH_BUFFER_BIT);
glClear performs bitwise OR of its input values. In this project, we do not need to clear the depth buffer since we are only rendering a plain colored screen. The depth buffer is relevant when we render an object with vertices at a certain depth. After clearing the color buffer, glClear uses the argument passed to glClearColor as background color for the display.
GLESNative::SetViewport indicates the dimensions of the GLES display to the GLES driver by calling glViewport.
glViewport(0, 0, width, height);
This function is relevant when we render 3D objects and need to ensure that rendering is not distorted when the device orientation is changed from portrait to landscape or vice versa.
jniCalls
Now let us look at JNI calls that are the glue that binds Java and native code.
AS simplifies the task by automatically creating function definitions for JNI calls. Say we declare a native call in GLESContextActivity.java as:
private native void CallToNative();
Now CallToNative will be highlighted in red since Android cannot find its corresponding JNI call. We select the function name in the above declaration, wait for context aware menu prompt  to appear, click on it to bring up the popup menu, and select "Create function
 Java_com_anandmuralidhar_glescontextandroid_GLESContextActivity_CallToNative". This will create a function definition for the JNI call in a .cpp file. If you do not have any .cpp file, then it will create a .c file with the function definition. A keyboard shortcut to pull up the context aware menu is ALT+ENTER.
jniCalls contains two files corresponding to JNI calls from respective Java counterparts. We need to ensure all JNI calls refer to the same native object. Hence we define a global pointer to GLESNative in glescontextactivity.cpp.
GLESNative * gGlesObject;
We create an object of type GLESNative in JNI call for CreateObjectNative and assign it to the global pointer. This object is later deleted in the JNI call for DeleteObjectNative. Since these JNI calls are made during onCreate and onDestroy of GLESContextActivity, the object persists throughout the lifetime of the activity.
In all JNI calls, we check that gGlesObject is not NULL before calling its methods. Though it seems unnecessary in this project, it is a good idea to have such a check in case a Java thread makes a JNI call before the native object is created. This check can prevent a potential crash in the app in such a scenario.
The remaining JNI calls in this file, IsInitsDoneNative and GetGLESVersionNative, perform obvious roles. As mentioned before, GetGLESVersionNative does not call a GLES function to get the GLES version since it is called by AsyncTask on a non-GL thread. GetGLESVersionNative simply copies the version information and sends it to Java for display on the screen.
myGLRenderer.cpp contains the implementations of JNI calls from MyGLRenderer.java and the three functions in it are self-explanatory. All JNI calls reference the same native object by declaring the global pointer:
extern GLESNative * gGlesObject;
To briefly summarize, we create and retain a native object throughout the main activity’s lifetime. Then we call various methods of the native object from the GL thread in Java (through JNI) to perform GLES-related tasks.
Other important files and directories
We will briefly look at few files that can be useful while creating a similar project based on native code.
<project_path>/app/build.gradle and <project_path>/build.gradle
Since are using the experimental gradle plugin, these files will look little different if you are familiar with the regular gradle plugin. There are a few changes to build.gradle for the experimental plugin as mentioned in the documentation. I’ve also used the Android NDK samples and this post as a reference to create these files.
<project_path>/ndk_helper
This module points to <NDK_path>/sources/android/ndk_helper. These files have a useful set of functions that considerably simplify tasks in native code for reading shaders, creating GLES context, managing sensor information. We create a static module called ndk_helper comprising these files and link it to the project by specifying it in build.gradle. In this project, we are using a function gl3stubInit that is defined in gl3stub.c.
<project_path>/native_app_glue
This module points to <NDK_path>/sources/android/native_app_glue. Our native code does not use this module, but ndk_helper needs this module.
Above modules are included in the project by adding them to <project_path>/settings.gradle.
<project_path>/app/src/main/AndroidManifest.xml
We indicate in the manifest that the application uses OpenGL ES 2.0 API.
<uses-feature android:glEsVersion="0x00020000"></uses-feature>
This ensures that if we release the app on Google Play, then the app will only get installed on devices that do support GLES 2 or higher.
That's all for the first project! If you have any comments or if you are not able to test the project on your device, then please leave a comment.
Good stuff Anand! … 🙂
Thank You Anand very Much for such a briliant explanation! I got everything from this article 🙂
Thanks Petr, glad you liked the blog 🙂
Thank you for such a good explanation! Covered everything I needed 🙂
Thanks Kavyashree for your comment, glad you found it to be useful 🙂
Where is “SimpleARNative” library in the project? Can you please help me to get this library…
Hi Rohit,
This library is built when you compile the project. It is a device specific lib and you will need to build it yourself to get the project to execute on your phone.